백인감자

파이썬 OpenCV motion detection _ 검출 영역 이미지 저장 본문

OpenCV

파이썬 OpenCV motion detection _ 검출 영역 이미지 저장

백인감자 2017. 7. 17. 16:20

이슈사항


배경이 되는 frame update 가 안되는 코드라서 유동적으로 배경 frame 을 바꿔 줄 필요성이 있을 것 같다.

ex. 밝기의 변화, 첫 frame 에 사람이 찍히는 경우 등을 대비.

특히 밝기 변화에 너무 민감해서 불필요한 이미지가 저장된다.


frame :카메라에서 받아들이는 원본 영상

firstframe : background 영상, 카메라가 켜진 후 첫 번째 frame 이다.

gray : frame 에 grayscale 후 가우시안 필터 적용한 영상.

frameDelta : firstframe 과 gray 의 absdiff 를 적용한 영상.

thresh : frameDelta 를 이진화 한 영상. 여기서 findcontours 함수 사용하여 윤곽선 검출하고 객체 이미지 저장.


BackgroundSubstractorKNN 을 기존코드에 응용해봤는데 모션 검출이 정확히 이루어지지 않는다.(frame 전체를 잡음)

Background Substraction 종류별 비교 영상


종류별 코드 구현 예시 : http://docs.opencv.org/3.0-beta/doc/py_tutorials/py_video/py_bg_subtraction/py_bg_subtraction.html


검출 영역 이미지 저장


출처 : http://www.pyimagesearch.com/2015/05/25/basic-motion-detection-and-tracking-with-python-and-opencv/


위 출처에서 잘 만들어 놓은 예제에서 detecting 된 이미지들을 저장하는 방식으로 수정을 하였다.

출처코드 line 56~57에서 에러가 발생하여

(_, cnts, _) = cv2.findContours(thresh.copy(), cv2.RETR_EXTERNAL,

cv2.CHAIN_APPROX_SIMPLE) 로 수정하였다.(OpenCV 3.0 부터는 이 코드를 사용해야 한다고 한다.)


영상을 찍었을 때 첫 번째 frame 자체를 배경으로 인식하기 때문에 사람이 찍히지 않는 상태여야지 좀 더 정확한 결과가 나올 것이다.


영향을 주는 요소들은 다음과 같다.

fps -->videoCapture 객체의 set 함수를 통해 조절 가능

영상의 width, height --> cv2.resize() 함수를 통해 조절 가능

detecting 의 최소 픽셀 크기 (default = 500)


argument 설명


터미널 혹은 cmd 에서 python -m 파이썬코드.py -v 동영상이름 으로 하면 저장된 동영상에 대해서 motion detect 수행


ex. python -m 파이썬코드.py -a 8000 를 하면 검출하는 모션의 픽셀크기가 최소 8000 이다.

참고 : 파이썬에서 경로 설정시 \ 대신 / 로 바꿔줘야 한다.


저장되는 이미지가 많기 때문에 frame번호_각 frame 당 count 된 영역 개수 와 같은 형식으로

1프레임에 4번째 검출된 영역이면 frame1_4.jpg 와 같은 형태로 저장하였다.


1
2
3
4
5
6
7
8
9
10
11
12
13
14
15
16
17
18
19
20
21
22
23
24
25
26
27
28
29
30
31
32
33
34
35
36
37
38
39
40
41
42
43
44
45
46
47
48
49
50
51
52
53
54
55
56
57
58
59
60
61
62
63
64
65
66
67
68
69
70
71
72
73
74
75
76
77
78
79
80
81
82
83
84
85
86
87
88
89
90
91
92
93
94
95
96
97
98
99
100
101
102
103
104
105
106
107
108
109
110
111
112
113
114
115
116
117
118
119
120
# -*- coding: cp949 -*-
# import the necessary packages
import argparse
import datetime
import time
import cv2
import numpy as np
 
#현재 설정
#fps=15 , video size = 640 *480
#3 frame 당 한 번씩 motion check
#터미널 혹은 cmd 에서 python -m  파이썬코드.py -v 동영상이름   으로 하면 저장된 동영상에 대해서 motion detect 수행
#ex.  python -m  test.py -a 8000  를 하면 검출하는 모션의 픽셀크기가 최소 8000 이다.
#참고 : 파이썬에서 경로 설정시 \ 대신 / 로 바꿔줘야 한다.
 
# construct the argument parser and parse the arguments
ap = argparse.ArgumentParser()
ap.add_argument("-v""--video", help="path to the video file")
ap.add_argument("-a""--min-area", type=int, default=500, help="minimum area size")
args = vars(ap.parse_args())
 
# count frame number
count = 0
 
#save video -->not complete
#fourcc=cv2.VideoWriter_fourcc('M','J','P','G')
#out = cv2.VideoWriter("C:/Python27/test_image/out.avi", fourcc, 20.0, (640,480))
 
# if the video argument is None, then we are reading from webcam
if args.get("video", None) is None:
    camera = cv2.VideoCapture(0)
 
    time.sleep(0.25)
#영상 fps 설정
    camera.set(cv2.CAP_PROP_FPS, 15)
 
 
# otherwise, we are reading from a video file
else:
    camera = cv2.VideoCapture(args["video"])
 
# initialize the first frame in the video stream
firstFrame = None
 
# loop over the frames of the video
while True:
    count = count + 1
    # grab the current frame and initialize the occupied/unoccupied
    # text
    (grabbed, frame) = camera.read()
    text = "Unoccupied"
 
    # if the frame could not be grabbed, then we have reached the end
    # of the video
    if not grabbed:
        break
 
    # resize the frame, convert it to grayscale, and blur it
    frame = cv2.resize(frame, (640480))
    gray = cv2.cvtColor(frame, cv2.COLOR_BGR2GRAY)
    gray = cv2.GaussianBlur(gray, (2121), 0)
 
    # fps 출력
    fps = camera.get(cv2.CAP_PROP_FPS)
    print fps
    # if the first frame is None, initialize it
    if firstFrame is None:
        firstFrame = gray
        continue
    # compute the absolute difference between the current frame and
    # first frame
    frameDelta = cv2.absdiff(firstFrame, gray)
    thresh = cv2.threshold(frameDelta, 25255, cv2.THRESH_BINARY)[1]
 
    # dilate the thresholded image to fill in holes, then find contours
    # on thresholded image
    thresh = cv2.dilate(thresh, None, iterations=2)
    (_, cnts, _) = cv2.findContours(thresh.copy(), cv2.RETR_EXTERNAL,
                                    cv2.CHAIN_APPROX_SIMPLE)
 
    # loop over the contours
    # count region in each frame
    count2 = 0
    if (count % 3 == 0):
        for c in cnts:
            count2 = count2 + 1
            # if the contour is too small, ignore it
            if cv2.contourArea(c) < args["min_area"]:
                continue
 
            # compute the bounding box for the contour, draw it on the frame,
            # and update the text
            (x, y, w, h) = cv2.boundingRect(c)
            cv2.rectangle(frame, (x, y), (x + w, y + h), (02550), 2)
            # save each rectangle(==ROI)
            img_trim = frame[y:y + h, x:x + w]
            cv2.imwrite("C:/Python27/test_image/frame%d_%d.jpg" % (count, count2), img_trim)
            text = "Occupied"
    # draw the text and timestamp on the frame
    cv2.putText(frame, "Room Status: {}".format(text), (1020),
                cv2.FONT_HERSHEY_SIMPLEX, 0.5, (00255), 2)
    cv2.putText(frame, datetime.datetime.now().strftime("%A %d %B %Y %I:%M:%S%p"),
                (10, frame.shape[0- 10), cv2.FONT_HERSHEY_SIMPLEX, 0.35, (00255), 1)
 
    # show the frame and record if the user presses a key
    cv2.imshow("Security Feed", frame)
    #out.write(frame)
    cv2.imshow("Thresh", thresh)
    cv2.imshow("Frame Delta", frameDelta)
    key = cv2.waitKey(1& 0xFF
 
    # if the `q` key is pressed, break from the lop
    if key == ord("q"):
        break
 
# cleanup the camera and close any open windows
camera.release()
#out.release()
cv2.destroyAllWindows()
 
cs


detecting 영역 크기를 2500픽셀로 설정, fps 15 , 640 * 480 으로 설정하고 객체이미지 저장을 조절하기 위해 3 frame 당 한 번씩 움직이는 객체에 대한 저장을 수행하였다.

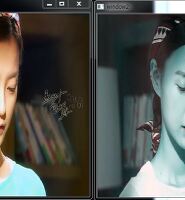
촬영한 영상에 대한 결과는 아래와 같다.


저장된 움직이는 객체 이미지 목록은 다음과 같다.


Comments